In this blog post I want to focus a bit on the “new” navigation panel. There were a couple of things users wanted Royal TS to do in that panel. We got feedback like:
- Allow to open/display multiple documents in the tree
- Filtering (we introduced similar filtering already in Royal TS 1.7.x)
- Collapse panel/auto-hide panel
- Allow for nested folders
- Moving items around freely, even to other documents
- Configurable mouse events
I think we were able to implement everything users asked for and more. One thing to notice upfront: tasks and credentials (new to V2) are now also shown in the tree as connections. Additionally we introduced a new connection type in V2: “Web Page” connection (more connection types are on our roadmap!). This connection type works pretty much the same as the remote desktop connection except that it shows a web page instead of a remote desktop. Pretty handy when you have to deal with multiple admin UIs (like router configuration, web based management consoles, Sharepoint, etc.).
The “Navigation” panel is used to work with various documents and objects. This is the main interface to interact with your own Royal TS documents (.rtsx files) and the “Application” document. The following screen shot shows the navigation panel with two files open:
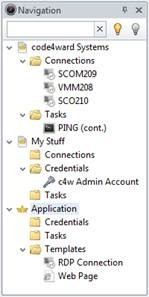
What is the “Application” document?
As you can see, at the very bottom of the tree, there’s an “Application” document. This is a special kind of document which will always be opened and showed in the navigation panel. You can add folders, tasks and credentials to the application document and you can modify the default template settings in the “Templates” folder. You cannot add any connections to the application document. You cannot delete the templates folder or template connections. To add connections you need to create or open a Royal TS document.
The application document will always appear at the very bottom of the navigation tree.
Filter Pane
The navigation panel offers a filter pane:
![Windows-Live-Writer-4ccdda9d44b1_93B0-clip_image004_3[1]](/blog/user/pages/06.blog/royal-ts-v2-about-the-new-navigation-panel/Windows-Live-Writer-4ccdda9d44b1_93B0-clip_image004_31.jpg)
Entering a filter text will only show items containing the text. Filtering is case insensitive. All folders containing search result will also automatically expand to show the filtered results. Folders with no search result are hidden. Click on the “x” button to clear the filter.
The light bulb buttons on the right of the filter text box allows you to quickly filter for only connected items or disconnected items. Click the light bulb buttons again to clear the filter.
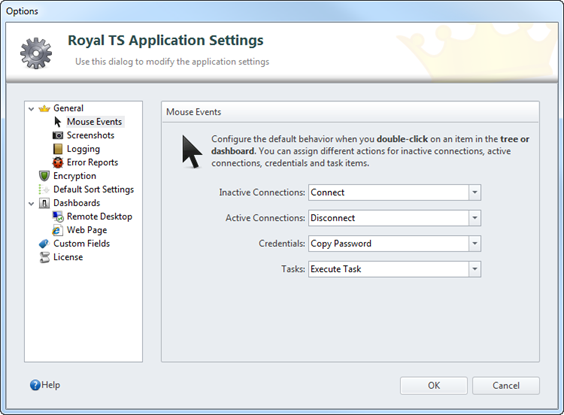
Mouse Events
Depending on your configuration in the “Options” dialog (available through the “File Backstage” view), the navigation panel is able to execute default commands when you double-click on an item (such as “Connect” or “Reconnect” for connections).
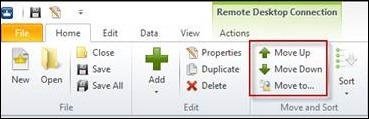
Drag & Drop (Manual Sorting)
You can use drag & drop to re-order your items in the tree. You can even move items between documents.
Another way of moving items around is using the “Move Up”, “Move Down”, and “Move to…” command from the ribbon.
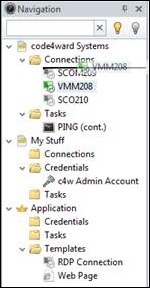
Connection State Indicator
There’s also a visual indicator showing you which connections are active (connected). Inactive connections have a partly translucent icon whereas active connections show up much more prominent in the tree. Here’s an example:
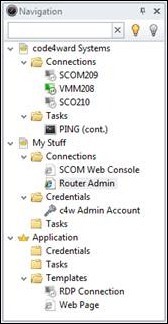
As you can see in the picture above, the connections VMM208 and Router Admin are active, all the other connections are inactive.
Docking
You can close or auto-hide the navigation panel:

To bring back or show a closed or hidden navigation panel use the “Navigation” ribbon button on the “Home” tab. Auto-hidden panels can “slide” into view by hovering the mouse over the collapsed panel header.
The navigation panel can be docked to any edge. The navigation panel cannot be tabbed to the connection tab bar.