During the Royal Server beta period, one of the most requested features was “Secure Gateway” or “SSH Tunneling”. We gathered a lot of feedback and worked hard on implementing tunnel support in our Royal TS and Royal TSX clients as well as in our new product, Royal Server. Our implementation is based on the SSH standard and is tightly integrated into our desktop clients and our server product. No hacky approach using PuTTY or any other external applications were implemented and when you are using Royal Server as a secure gateway, you will be amazed how easy it is to install and setup.
Note: This feature is included in the current beta releases of Royal TS/X and Royal Server.
What is a “Secure Gateway”?
A Secure Gateway is a component included in Royal Server which can be used to access computers through an encrypted SSH tunnel (aka port forwarding). Those computers are not directly reachable, only through the gateway server.
Here is an example how a Secure Gateway can be used: As a consultant you could access your customers infrastructure through the gateway and work remotely on machines which are not directly reachable from the internet. The secure gateway server requires authentication and provides an encrypted “tunnel” to the infrastructure “behind” the gateway. This is a very popular and secure method to provide access to internal machines and has many benefits compared to VPNs or direct NAT.
Of course you can also use a 3rd party SSH server as long as it supports port forwarding. OpenSSH, for instance is included out of the box in many Linux distributions. OS X also ships with an SSH server but it’s disabled by default. Here’s a short guide on how to enable it on OS X Yosemite.
Which Connection Types are supported?
-
Royal TS (for Windows) V3.1: Download Beta
- Remote Desktop
- VNC (based on TightVNC and UltraVNC)
- Terminal (based on Rebex.net and PuTTY)
-
Royal TSX (for OS X) V2.1: Download Beta
- Remote Desktop (based on FreeRDP)
- VNC (based on Apple Screen Sharing)
- Terminal (based on iTerm2)
The connection types Hyper-V, Terminal Services, Windows Events View, Windows Processes and Windows Services can also be used to access internal machines through Royal Server.
Installing a Secure Gateway
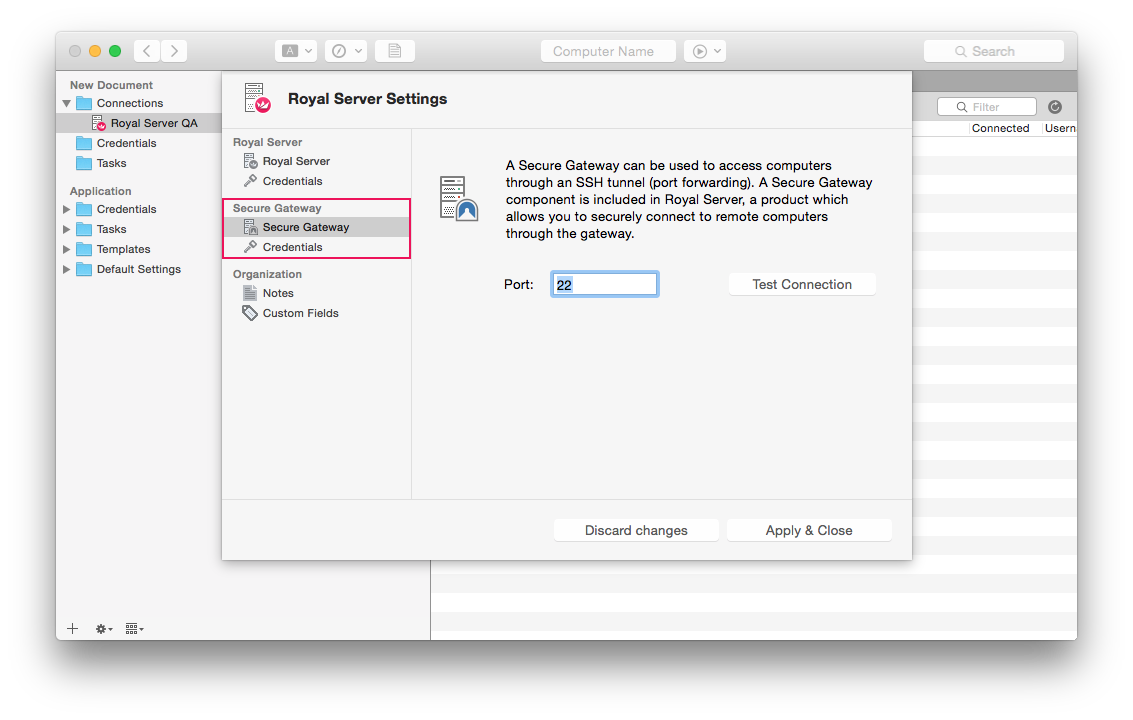
Setup is very quick and easy. If you haven’t already installed Royal Server, simply download the latest Royal Server V1.1 beta and install it. Royal Server is literally installed within minutes. Once installed, open the Royal Server Configuration Tool and switch to the Secure Gateway section:
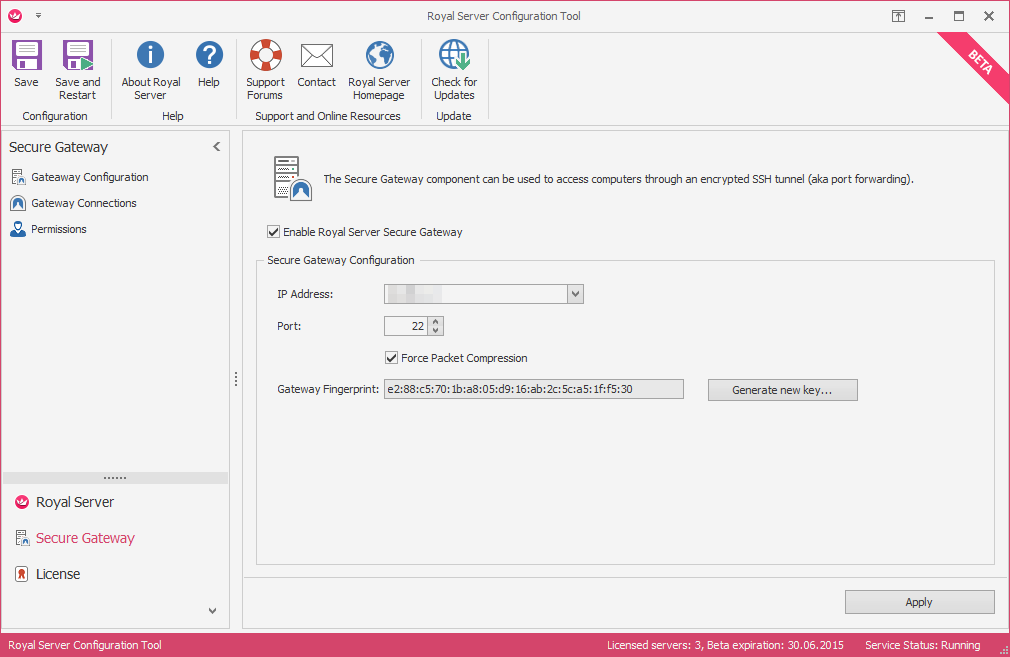
The Secure Gateway feature is enabled by default. Select on which IP address and Port the gateway should be listening. The Gateway Fingerprint will be shown in Royal TS/X when you connect for the first time and helps you ensure that you connect to the right gateway, preventing “man-in-the-middle-attacks”.
Since a Secure Gateway always requires authentication, you need to configure which users are allowed to use the gateway. The Royal Server installation automatically creates a group “Royal Server Gateway Users“. Simply add the members that should be allowed to use the gateway to that group.
The Gateway Connections page provides a view with all open connections:

As you can see in the screenshot above, you see the clients connected to the remote hosts and which user is currently connected. There are also some statistics, like connect time and data sent/received.
Using a Secure Gateway in Royal TS/X
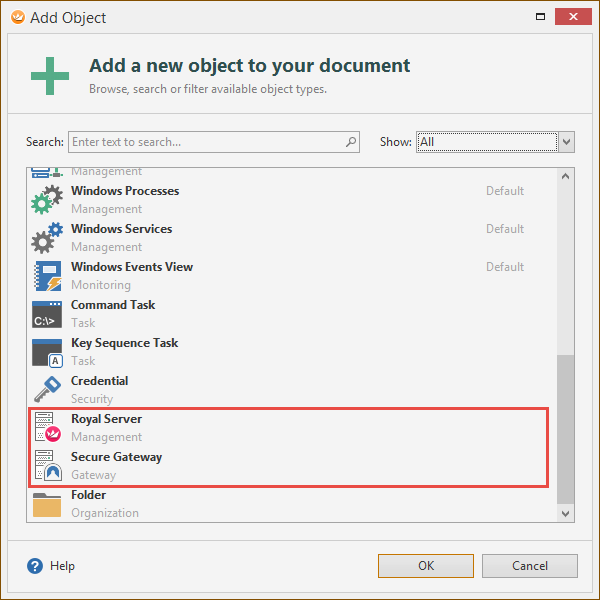
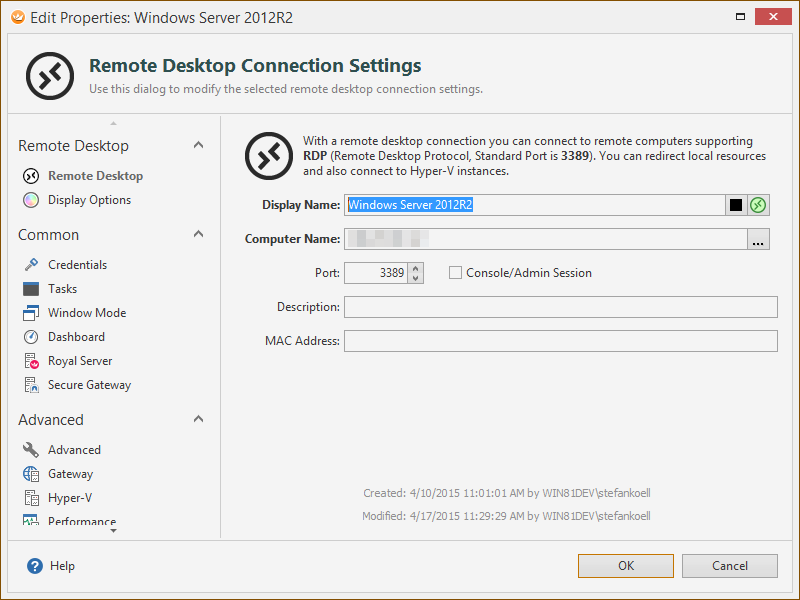
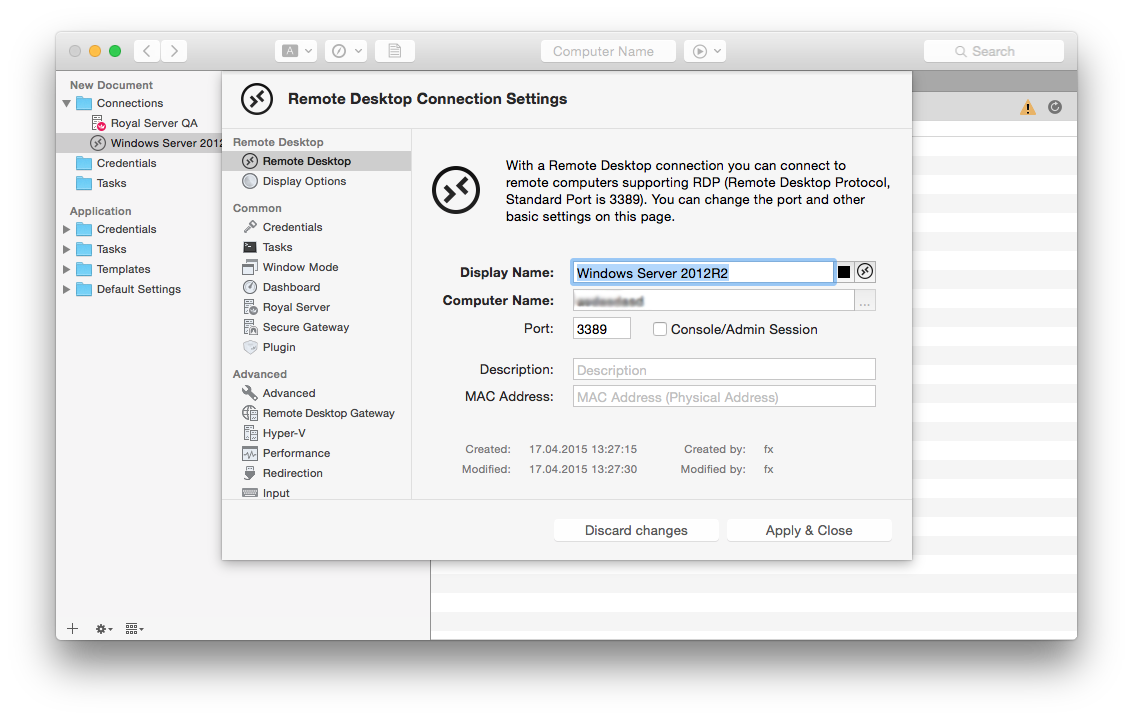
Once Royal Server is installed, you can create a new “Royal Server” object in your document, pretty much the same way as with connections or credentials. In Royal TS (for Windows), either use the Edit ribbon tab or the Add -> More… menu and select Royal Server. If you’re using Royal TSX (for OS X) you can use the Add menu.
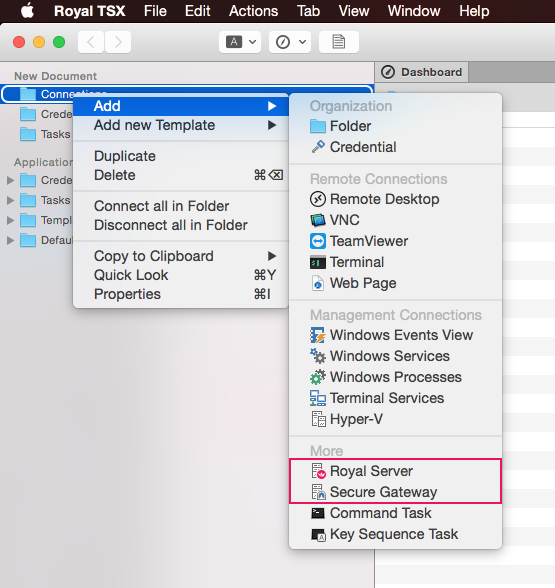
Note: In case you want to use a 3rd party SSH server for tunneling, you can also just create a Secure Gateway object.
In the Royal Server main settings page, make sure you enter the hostname/IP address of the installed Royal Server in the Computer Name field. In case you have changed the port number on the server, you can change it in the Secure Gateway settings page. There’s also a Test button which allows you to quickly test connectivity.
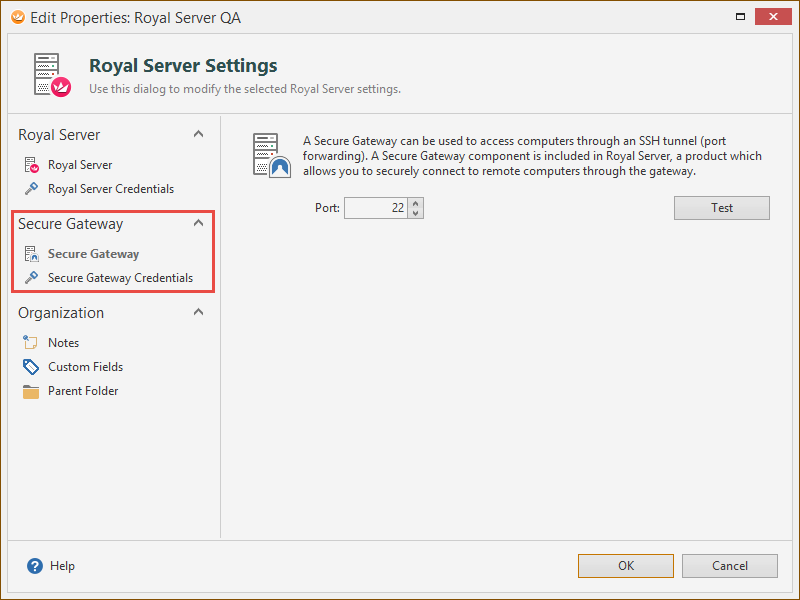
Also make sure you enter proper credentials in the Secure Gateway Credentials settings page. Configure a credential which represents a user who is a member of the Royal Server Gateway Users group (was mentioned above).
Once you have created the Royal Server object in your document, you can assign that object to any of your Remote Desktop, VNC or Terminal connections. In the Computer Name field, use the hostname or IP address of the destination server, as seen from the computer running Royal Server.
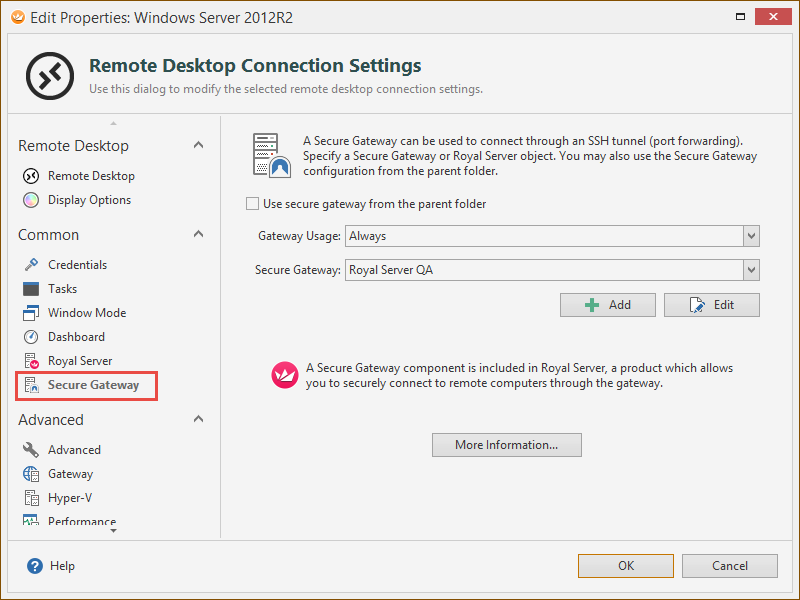
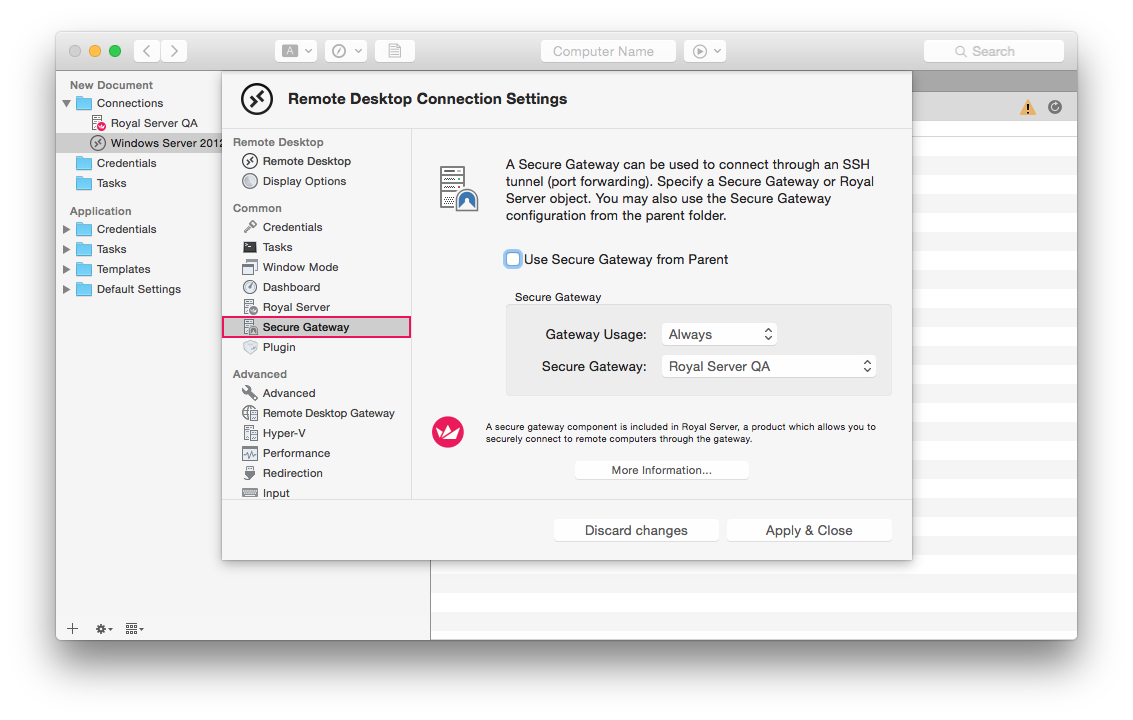
In the Secure Gateway settings page, select the Royal Server or Secure Gateway object you just created and set the Gateway Usage to Always:
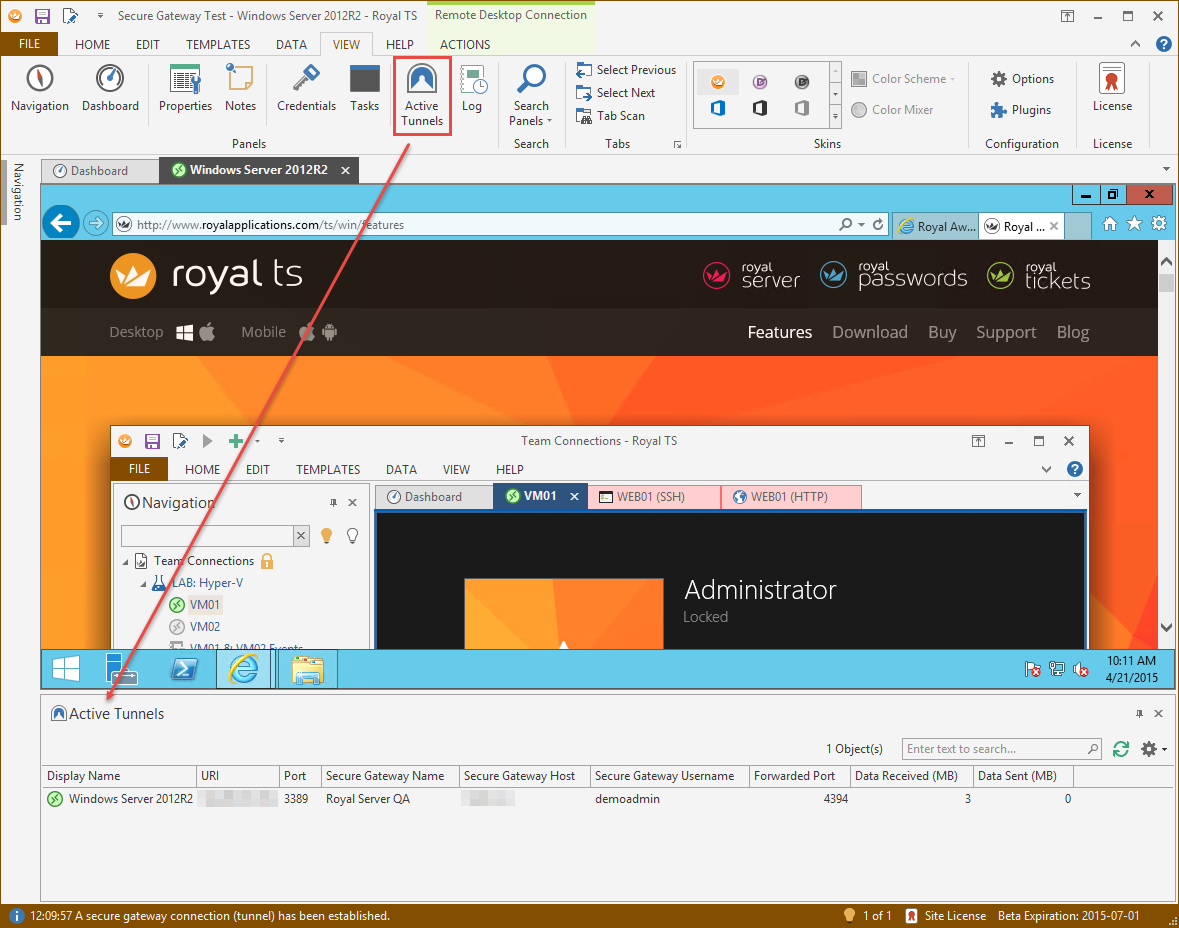
Active Tunnels
Once you have established a connection through a tunnel, you can check on all tunnels of a specific Secure Gateway/Royal Server using the Dashboard:
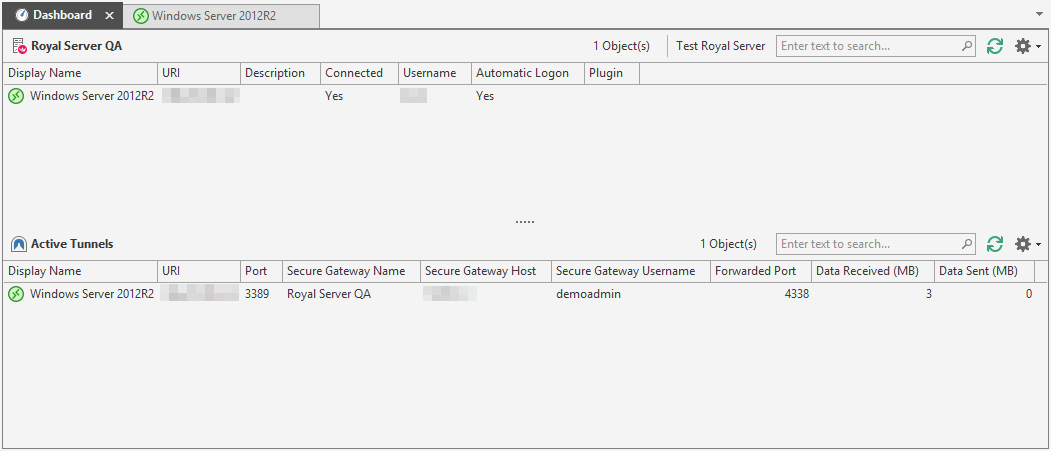
or check on all tunnels of all Secure Gateways or Royal Servers (in case you are using multiple gateways) using the Active Tunnels panel:
Happy Tunneling,
The Royal Apps Team