One major new feature in Royal TS V2.1 and Royal TSX V1.2 is the so called “Templates”-feature. In short, templates are “special” connections which can be created or connected to based on other connections (even from a different connection type). You can “inject” values from the selected connection(s) into the resulting connection, basically pretty much the same as you already do with command tasks.
How can I create a Template?
First of all, templates are stored within your Royal TS document the same way as all the other connections and objects. You can organize your templates the way you want. You can even place templates in other documents to share them with your team, again, very similar to tasks: As soon as the document is loaded, the containing templates are available to you.
To create a new template, use the Templates tab and click on your desired connection type for which you want to add a new template:

Note: If you’re using Royal TSX (for macOS) you can find the “Add New Template” menu by holding down the option/alt key, then opening the “Actions” menu (or control-/right-clicking a folder).
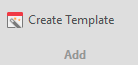
Alternatively, you can use an existing connection and create a new template based on the selected connection using the Create Template button:
What can I do with Templates?
Templates can be used for many things and elevates the flexibility of Royal TS/X to a new level. Here’s what you can do with templates:
Add from Template
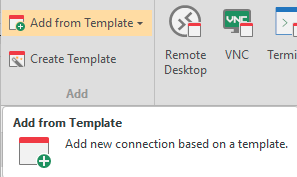
When you use the standard Add button to create a new connection Royal TS/X is using the Default Setting for the connection type as a starting point. Using the Add from Template feature populates the Add Connection dialog with the values from the selected template:
This can be very useful if you constantly need different settings, maybe depending on the customer or environment. You can now create a template for each customer or environment and use the template to quickly create a connection with the preconfigured values.
Connect using Template
You can create an “Ad Hoc” connection based on the template settings with tokens injected from the selected connection(s). Here’s an example to illustrate how this can be help:
Example: Create a Web Page connection based on a Remote Desktop connection
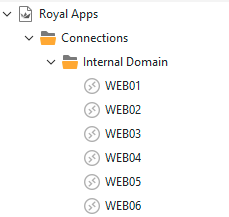
Imagine you have a couple of hundreds RDP connections in your Royal TS document:
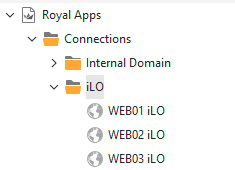
Each of the above connection represents a physical machine which can be managed using a web based iLO interface. You could create a web page connection for each machine, like this:
I think you get the idea. This scenario is hard to manage and a template solves this problem very elegantly.
Let’s assume your Remote Desktop connections connect to the primary NIC using WEB01, WEB02, etc. as a host name and further, let’s assume that your iLO interface is reachable under https://WEB01.management.c4w.local:17900/login.htm and https://WEB02.management.c4w.local:17900/login.htm and so on.
As mentioned above, the Templates tab has a new drop down button which allows you to create a new connection template:
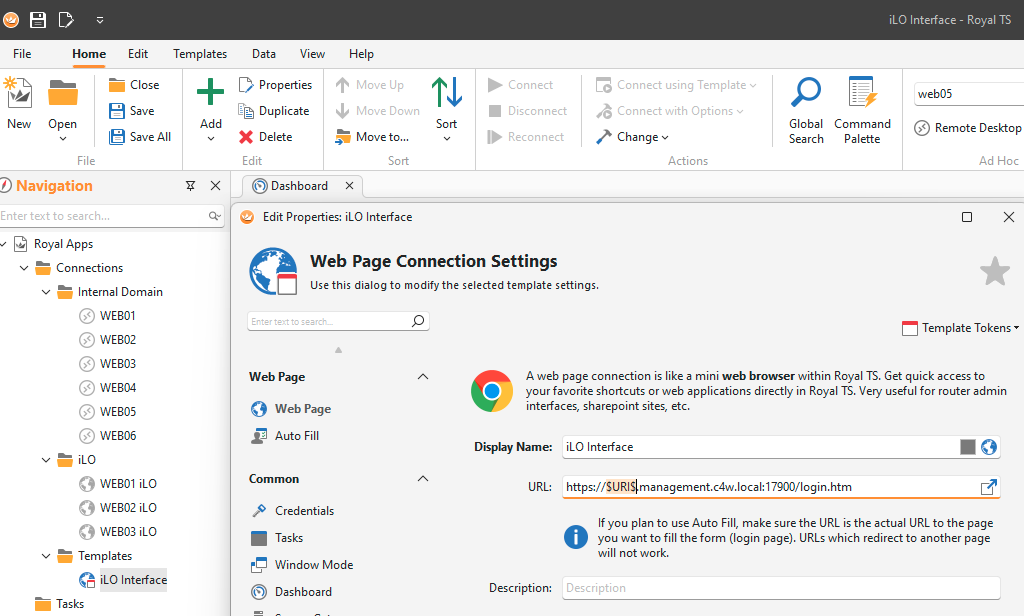
The template settings dialog looks pretty much the same as the usual connection settings dialog but in addition it allows you to insert “replacement tokens” (similar to those in the task configuration). The Templates Tokens button on the top, right corner helps you to browse all available tokens from all different connection types. In our example we configure the template to “inject” the URI (which is the host name in our remote desktop connection) in our URL field: https://$URI$.management.c4w.local:17900/login.htm
Configure the rest of the connection settings as it was a dedicated web page connection and save the template to a document/folder of your choice. After selecting a connection you can now either use the Connect using Template drop down button in the ribbon or the menu in the context menu:
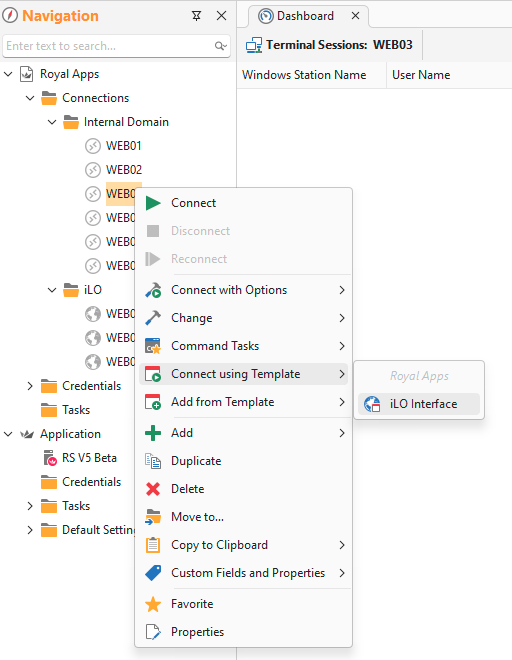
The drop down/submenu shows all available templates from all currently loaded documents. As shown in the picture above, we’ve selected WEB03 and when we click on “iLO Interface” (the name of our previously created template), an Ad Hoc connection to https://WEB03.management.c4w.local:17900/login.htm using the settings from the template will be opened.
More ways like this to make use of templates:
The above approach can also be used to create Ad Hoc connections of the same connection type using slightly different settings. One possible use case would be to have a Remote Desktop connection template with a different port configuration or with a value injected from one of the custom fields to connect to an alternate host in case you are connecting from a different environment.
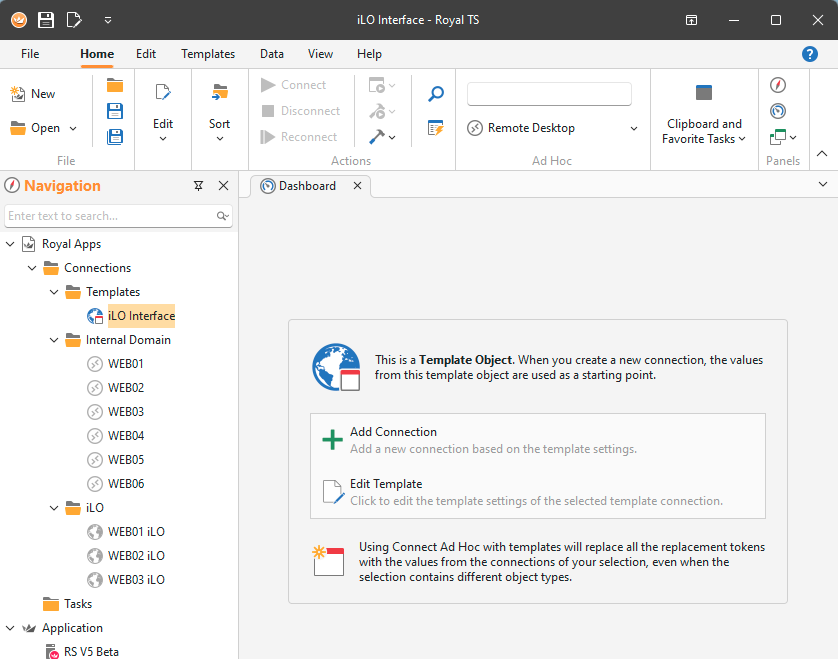
Connect Ad Hoc using the Template Dashboard
Selecting a template shows the Dashboard (similar to the default settings) which allows you to create an Ad Hoc connection using the template settings:
Note: If you’re using Royal TSX (for macOS) and your first tab is the “Overview” instead of “Dashboard”, you can switch to the Dashboard by clicking the tab’s icon or using the View – Switch to Dashboard menu item.
The text entered in the Ad Hoc Connect text box is used to replace the $URI$ token in the template or – if not specified – will be set as the URI of the connection.
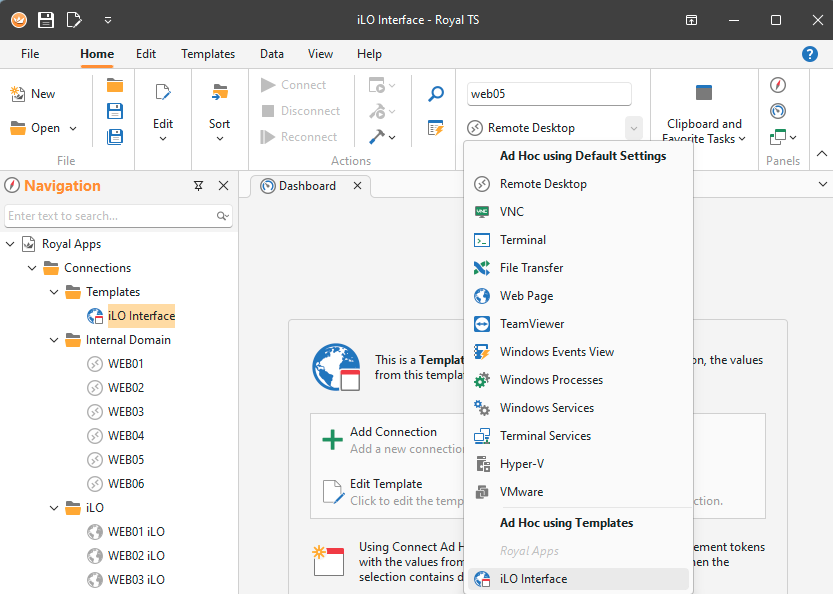
Connect Ad Hoc from the Ribbon
Very similar to the dashboard, you can create ad hoc connections directly from the ribbon (toolbar on macOS):
cheers,
The Royal Apps Team